 Igor has recently come with an idea to build an embedded version of SlimServer, the open source software we use to stream music to our Squeezeboxes around the house. Most of the time the Squeezeboxes are tuned to the Pandora Radio, but from time to time it is nice to have them play some local music (local - means stored locally - in house, as opposed to the Internet). To be able to do that, a local streaming server is necessary, as Squeezebox does not have any built-in storage - it is just a network player / streamer. My first approach was to build a silent PC, dedicated as a media server (and running SlimServer software among other tasks), but this has several drawbacks - boot time, Windows patching, and price. Igor found the guys at NSLU2-Linux do run SlimServer on a tiny Linksys NSLU2 NAS (Network Attached Storage) device. The idea is really cool and I decided to give it a try.
 Here is what I prepared to start with:
- Brand new Linksys NSLU2 device ($83)
- 40GB 2.5" Hard Drive to store the music (excavated from my IBM T41, but you can use just any IDE drive)
- 2.5" USB HDD Enclosure to house the hard drive, with cable (something like that)
First I thought of using a two drive configuration with flash USB memory stick as a main system volume and HDD as a "media" drive for music, but after reading a bit here and there I realized the system drive has to have a "swap" partition. Flash drives have limited number of write cycles they can survive, so placing a swap on a flash would potentially reduce its lifespan considerably. Therefore I decided to go with a single drive configuration (i.e. one drive to store both operating system files and media / music). This has paid off in yet another way. I have noticed my 2,5" drive was stopping sometimes (during long writes), and the reason was the power consumption of the drive. It was just a little over the limit of 500mA supplied by a USB port. So finally I settled with a Y-split USB cable (actually the one that came with the USB enclosure) - so now one port (port 2) is used for communicating with the drive and second port (port 1) is used as an additional current source.
The process took the following steps to complete:
- Installing standard NSLU2 and drives, to check if everything works fine and get used to the platform.
- Installing Unslung firmware on the NSLU2.
- Unslinging the NSLU2 (i.e. moving Linux OS files from internal flash to the external USB memory stick).
- Installing Unslung Development Environment (compilers, make, etc.) and libraries (including Perl) necessary for the SlimServer software on the NSLU2.
- Compiling SlimServer remotely (on the NSLU2 box). During this process UDE will automatically download all the necessary components from the internet.
- Configuring the music library.
And here is the entire procedure from start to the end:
- Start with setting up the NSLU2 the way Linksys wants you to. This way you will learn how the device behaves and you will be sure the hardware works OK. Format the drives from the web admin interface. Upgrade the internal flash rom at this step to the latest Linksys version. Also make sure the internet connection is working fine, as later on the NSLU2 will download certain files automatically. There is a nice feature of administrative alerts that are sent to the user-defined email address. I suppose most of you (like me) have an Internet router in the home network, so the natural approach is to plug the NSLU2 to one of the LAN ports in the router.
Note: if the setup utility does not detect the NSLU2, then probably you need to turn the Windows XP firewall off to complete the setup procedure. And don't forget to turn it on again... [time: 1-3 hours] - When everything works fine with the standard configuration, install the latest Unslung firmware. Go to http://www.nslu2-linux.org/wiki/Main/HomePage or directly to the http://www.slug-firmware.net/u-dls.php. Download the latest release, unzip it and read the Readme document several times, until you are sure you understand everything you are doing. [time: 1 hour reading the docs, 15 minutes preparation and flashing]
- Unslinging. This is a process of moving the root file system of the NSLU2 to an external drive and preparing the drive for further installations. Detailed instructions are in the Unslung firmware readme document you downloaded in step 2. [time: 15 minutes]
- Now install the SlimServer. There are several steps involved in this process, the detailed guide can be found at http://www.nslu2-linux.org/wiki/Applications/SlimServer. As I do not have any Linux experience (yet!), there were several things that left me scratching my head and looking for an answer:
Copying the SlimServer source to the NSLU2. First download the SlimServer Perl Source Code to your PC. Make sure it lands with a .tar.gz extension. Then using the NSLU2 web interface create a public share, open that share with Windows explorer and drag&drop the file there. It will land in /public directory on the NSLU2. Then using cp (copy) or mv (move) command copy or move it over to /usr/local and there just execute tar xzvf... as described in the original guide.
Editing the build-perl-modules.pl was another story simply solved by copying the file to /public, where it could have been picked by Windows WordPad for editing (for those of you who do not know vi).
I proceeded carefully line by line with the original guide and after about an hour my SlimServer was up and running and I could log on to it via the web interface (port 9000). [time: 1 hour] 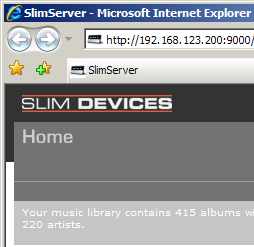 Configure SlimServer (using the web interface: http://...
- And finally configure your Linux OS to automatically start the SlimServer process when system starts. This is done by adding the following two lines:
cd /usr/local/SlimServer_v6.0.2
./slimserver.pl --daemon --prefsfile /etc/slim-data/slimserver.pref --cachedir /etc/slim-data
to the rc.local file located in /etc/rc.d folder.
Of course if your SlimServer landed in a different folder, you have to adjust the cd /usr/local/SlimServer_v6.0.2 command accordingly.
You probably wonder how to edit the rc.local file... Well... go and use the famous vi editor by typing vi rc.local. And here is how to operate it :) [time: 15 minutes]

On thing I am missing a little bit is the lack of WiFi connectivity on the NSLU2. There is a workaround here - if you are using the Slim Devices Squeezebox WiFi streamer. Squeezebox can act as a WiFi bridge, so you may just hook the NSLU2 to it, and the combo will be wireless.
All in all this exercise ignited my interest in small, yet powerful SBCs (Single Board Computers). More and more of these devices use one or the other form of Linux as an operating system and really prove software portability. My first SlimServer runs on a Windows XP machine based on Intel Pentium CPU (with a couple of fans). This is my second one and it runs on an embedded Linux machine (big as a pack of cigarettes) based on ARM. Fantastic!
Very nice! I might check it out. Thanks for the detailed description.
ReplyDeleteAre you still using this setup?
Hi, unfortunately not...
ReplyDeleteIt worked nice, but then I wanted to upgrade the disk drive and when tried to follow up the same procedure found out SlimServer had moved from SQLlite to MySQL and this setup no longer compiled on the Slug... Recently however I have checked the NSLU2-Linux pages and they have an update, so it should be fixed now...
Personally I am now moving towards the big - iron home server appliance, the Infrant ReadyNAS. Plan to post several blog entries on that soon...
Looking forward to that blog then!
ReplyDeleteCan you also tell us why you picked the Infrant over, say, a LinkStation?
Yes, Infrant platform seems to be more expandable... both hardware - wise (up to 4 drives -> 4TB in total) and software - wise - more dedicated plugins (like replication jobs -> I intend to setup two synchronized sites). They also used to partner with Slimdevices, so I believe the Squeezebox setup should be more streamlined as well (actually Slimserver comes preloaded on Infrant boxes).
ReplyDeleteHi
ReplyDeleteJust a quick question ...
I have the squeezebox and was looking for a configuration to set up my Seagate Freeagent Pro USB Storage as a NAS when I stumbled upon your page. I want to do exactly as you mention in your blog with the NSLU2. You said this will work with any IDE? .. Will this work with my USB storage device?
Many thanks
Steve
Hi Steve,
ReplyDeleteYes it should work. But please be aware the above description was posted more than a year ago. At that time Slimserver was version 6.4, based on the SQLlite database. Now we have Squeezecenter 7, based on MySQL. I have not tried the latest setup, and in the meantime the old (6.4) codebase is no longer available. So please use what I wrote as a general guide, keeping in mind the devil is in the details. Especially I am not sure the tiny amount of RAM present on the NSLU2 is enough to run the latest Squeezecenter.
Myself I currently run Squeezecenter on the Infrant / Netgear ReadyNAS box, but it comes preloaded so no extra work is needed.
HTH :)