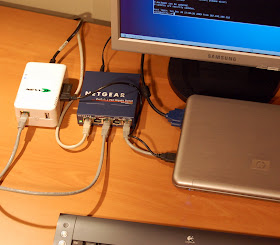
 The previous post on the initial Sheeva setup assumed readers had spent some time playing with the installer and with the Sheeva Plugcomputer itself. I received a number of requests to clarify things a bit more for beginners. So here is the more detailed description.
First, the plugcomputer itself. It is an integrated platform, based on SoC (System-on-Chip) offered by Marvell and named Kirkwood. Kirkwood contains so called ARM core, so all applications executing on this platform have to be compiled for ARM. The Sheeva has 512MB system RAM and 512MB system flash memory (so - called NAND memory). It also has four ports:
- 1GB RJ-45 Ethernet port - to attach to a network
- USB host port - can be used to plug a variety of USB devices - USB hubs, pen flash drives, protocol converters (like a 1-wire converter or a USB-to-RS-232 converter), USB cameras, keyboards, and even graphic monitors (using DisplayLink technology - more on this in later posts)
- MMC/SD card port - to plug a SD card. This is important, as I recommend playing with the Sheeva equipped with SD storage. Due to process of wearing, flash memory has limited number of write cycles. If an SD card wears out, you can just plug a new one. If your internal NAND flash wears out, the entire unit will have to be replaced.
- USB client port - this is used to initially setup the computer, before it can execute anything on its own.
- The so-called installer is a set of binaries and scripts. You have to download it from the plugcomputer.org site and unpack to either Windows or Linux host machine. As I never succeded setting up the Sheeva from a Windows host, I will focus on the Linux variant here.
- The installer has two parts. The first one is a set of binaries you have to copy to a pen flash drive. Then the populated pen drive has to be plugged to the USB port on the Sheeva. The second part are scripts, that are copied over USB link (a USB cable connected between Sheeva's client USB port and the host machine). The scripts are then executed on the Sheeva - their job is to move and unpack the binaries from the USB pen drive and place them either on the internal NAND flash memory or on the plugged SD card.
- The Linux installer is basically a PHP script, so it requires a PHP client to run, as I wrote previously. The entire install procedure is well described in the installer's readme file. In short - there are two basic variants - one installs the system on the internal NAND (executed by [sudo php runme.php nand]), the other installs them on the SD (executed by [sudo php runme.php mmc]).
As mentioned before - on my development Sheeva system I happen to refresh the OS quite frequently. With access to the boot environment it is a snap. Just plug in the previously populated flash pen drive with OS binaries, boot the Sheeva with serial console attached, and at the boot environment prompt just type [run recover1]. This partitions and formats the destination filesystem (NAND or SD card) and installs a fresh instance of the Ubuntu from the pen drive.
After the Ubuntu is set up, the serial console is no longer necessary, the USB cable can be unplugged. When Ubuntu loads, it may be accessed remotely from a host machine using SSH connection (terminal window in Linux or Putty in Windows). The default user is root and the default password is nosoup4u. Of course it is a good practice to change it after the first logon - by executing [passwd] command.
The other steps I run after the new clean install are:
- update the distribution sources:
apt-get update
- upgrade the system components to the current versions:
apt-get upgrade
- install the NANO - an easy and simple character based text editor to work on various configuration files:
apt-get install nano
- clean the updater cache and remove potential orphaned modules:
apt-get clean
apt-get autoremove - synchronize the system clock:
ntpdate pool.ntp.org
- burn it to the hardware clock:
hwclock --systohc
- and configure the time zone data:
dpkg-reconfigure tzdata
Well done, good initial informations.
ReplyDeleteIf you want you can add something about using PuTTY under Windows.
It's important to set PuTTY for no handshacking (default is XON/XOFF protocol).